
Made with in India
Made with in India
This post is a part of a series i plan to write periodically to document my exploits with CNC machines and other stuff I have built! This post is about a Table Top Pen scribler called “Sketchy” made with junkyard stuff that lets you draw stuff on paper !
I had proposed my guide that i intended to make a CNC for the final project. She didnt looked too confident that we will make it past the first stage neither were we. The image of a CNC that was in the mind was probably the one we had in our shops. Big Humongous !
I planned to make something smaller like a ShopBot or may be a shapeOko.To test the idea and establish confidence, I thought of making a tiny pen plotter for the mid term review that could draw intricate designs on a 4cm x 4cm paper piece.
I saw an amazing laser engraver made by a Swedish guy doing rounds on the internet which gave me enough confidence that it is possible.
The plan was to buy a couple of CD Rom drives and use the lens assemble to move a pen ( Did not use a laser citing dangerous repercussions ) in X and Y axis and a Servo controlling the pen lifts.
Next day, i was at ‘Wazirpur’ , my local IT hub in search of discarded office equipment. I knew a few people there who happily guided me to come late evening to pick up stuff from the pile that gets generated throughout the day.
As suggested, went there about 8pm and a junk pile was awaiting me. There were no promises as always. I bought 3 for 250 bucks. That night was going to be long as i had to open them and extract the assemblies. Thankfully testing them with my Stepper Tester they all turned out to be fine.
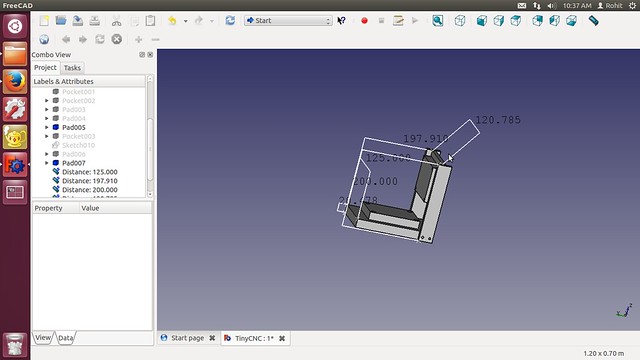
Now, the frame had to be made to have everything in place. We had recently got a new Airconditioner that came in a wooden frame. Ahaaaa!
I quickly gathered them and used some nooby CAD skills to make a frame out of it in digital. I didnt want to fail for the very first time.
CAD Package? FreeCAD :D
These were the designs:

After some lumber work, I replicated the design on actual wood. Its a fit.
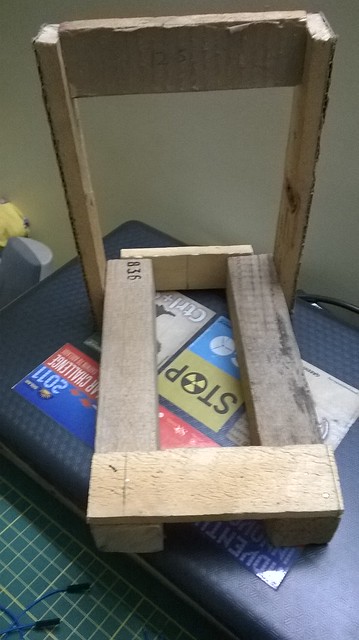
Now assembling the axis to the wooden frame was easy too. Just screwed them using a soft rubber damper which are originally used in CD ROMs. They help in absorbing stepper motor/movement vibrations. I used some old FRP to make a functional base and then a piece of cardboard from TI samples boxes to make a final plane surface. All held together by hot glue. A servo (from a broken RC Plane) to just sway away the pen when its done on the vertical axis was also glued.
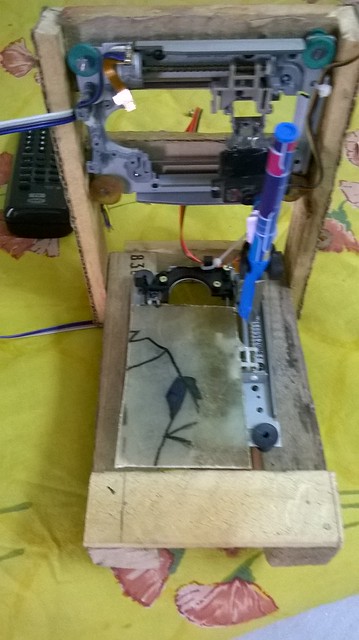
Time for the First Test
I used the MSP430 Launchpad to cook a basic code to make a small square( Nostalgic Logo Days ). You can notice the servo and felt pen. I ran into a problem.. Whenever the servo would finish it would make a long enough strike to destroy the art work.
So, instead of using this mechanism, of moving the pen on the paper, i should rather just lift the pen. But, I had blown the 3rd CD ROM i bought of over heating (higher current setting on stepper Driver). So, i had to do something with the servo only. The catch was to convert the circular motion of the servo to pen lifting motion. Analogy ? ? ?
PISTONS
Unfortunately the picture is not available as the old laptop crashed. I drilled a small hole in the pen and then screwed it to an arm that is attached to the point of rotation of servo motor. The pen was made to pass through a hole drilled in an acrylic sheet and pasted on the servo. Now whenever the servo would move up, the arm would move in a circular motion lifting the pen through the hole and voila the circular motion is converted to a up and down motion.
Next problem was with the software. I did make an elementary (could hardly do basic shapes) g-Code interpretor for MSP430 but it was not that robust and was not compatible with standard tools that could make the device far more incompatible with higher level software.
So, i made the switch to GRBL. GRBL brings hobby grade setups to professional levels. ShapeOko is an example. Also it runs on my 4$ Arduino Pro Mini happily.
Yee Haw!!
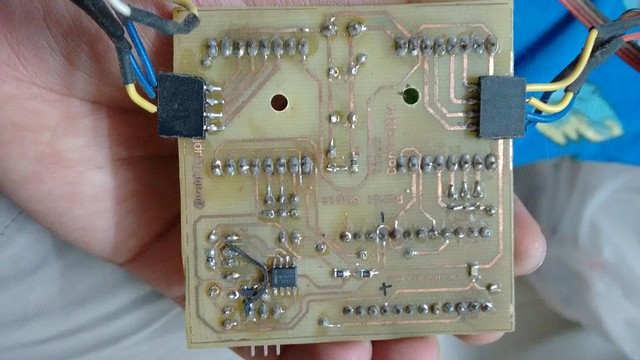
The only foreseeable problem left was to lift the Pen. Standard Grbl gives only a Spindle ON/OFF Command and a Spindle PWM command that does not work with servos. Running short of time, I added a slave MSP430G2230 to just check the Spindle ON/OFF pin (D12) and lift the pen accordingly. With all in place, I designed,etched,drilled and soldered my own control board. Check out the pics below:
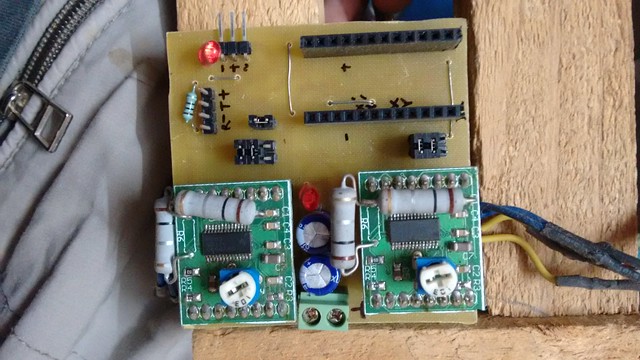
Check out the MSP430 Below and a teeny tiny SOT23 Voltage Regulator.
2 Bottlenecks were waiting for me down the line.
First: The way i implemented the PWM for servo was terribly buggy. To save time i was doing delay stuff. Bad ! The old and rickety servo motor gave up on me while trying to debug the issue. Problem solved by running down to LR late evening to get a brand new tower pro and doing a hardware PWM for the Servo.
Second: The curious case of tilted bed. The base of the setup where the paper was placed was not very smooth and this resulted in the pen not even making contact in some parts, destroying the job. Uff.. I could not figure out a solution soon.
Thankfully @anool helped and suggested me to use a spring loaded pen to overcome the undulations on the surface. With little trial and error, it worked out to be great.
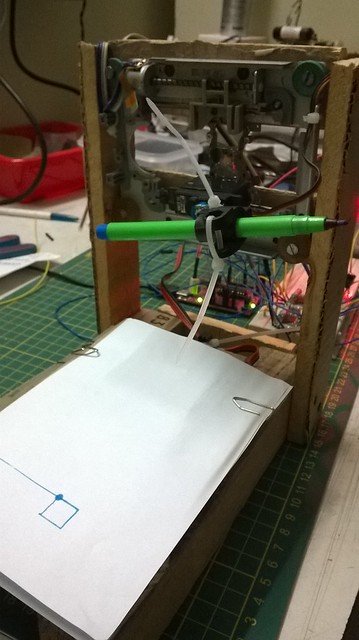
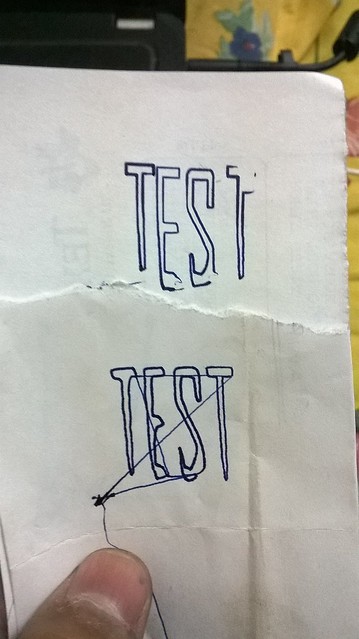
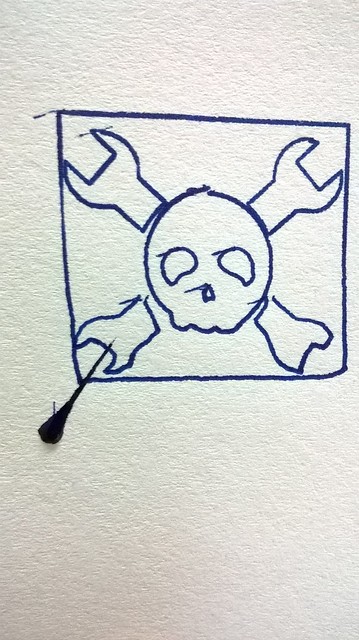
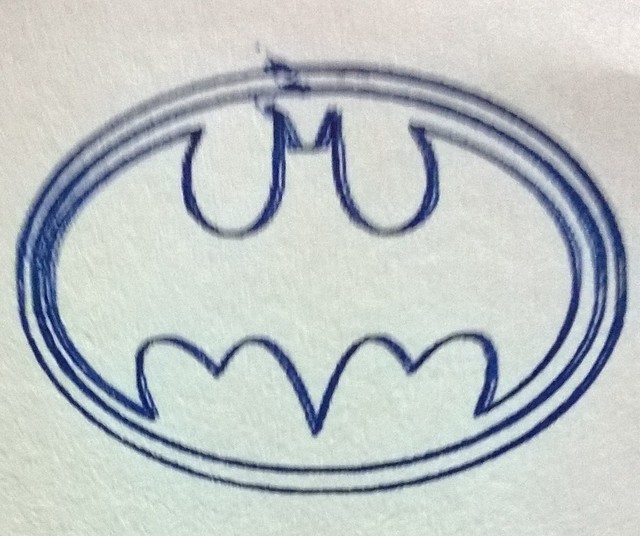
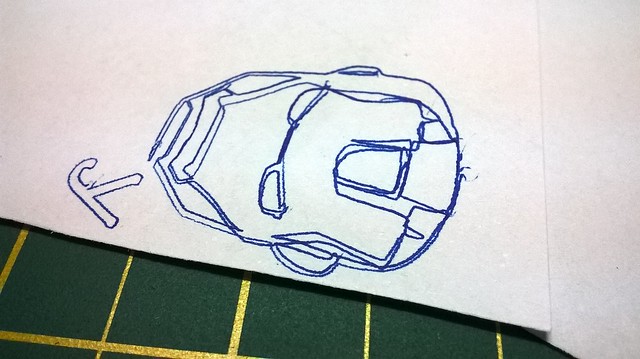
Check out the progress in the quality of output:
No pen lift mechanism:

New pen lift mechanism:

Changing the Servo angles a bit.
Workflow
The work flow is pretty standard one: The softwares used are :
Install Inkscape.
For the extension.Open the .zip file and copy all the contents to c:\Program Files\Inkscape\share\extensions. You have to restart Inkscape for the extension to show up.
Now Download and install grbl controller. Since my machine does not have the end switch you will have to take care of the constraints in the design and manually home the machine.
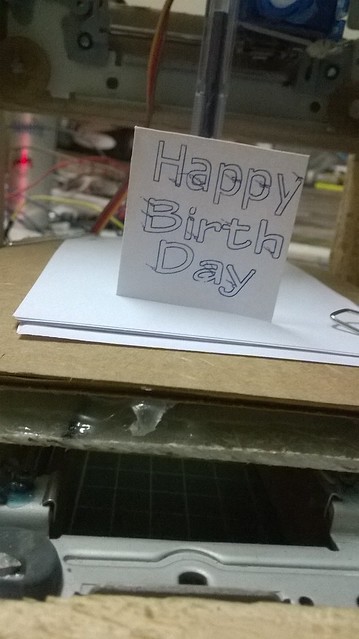
Now, draw the art work in inkscape and export the g code by running the extension. Load the .nc file in GRBL Controller and START the job!! Wohoo! The machine can pretty much draw anything.
Check out a couple of time lapses of the machine in progress.
Please feel free to ask any questions in comments below,
Cheers,
Rohit