
Made with in India
Made with in India
This post is meant to document to process of uploading data points gathered as a part of Interactive Data Viz course at IDC taught by Prof. Venkat.
The aim of the exercise was to experience the process of collecting, analyzing and contributing data points to openstreetmaps. This would allow the class to cperform a data mash-up. A data mash-up happens when a lot of data on various things is presented on a common -graphical- medium like maps. Data mash-ups can help us draw insights and suggest causality for certain occurrences. Through our experience, we learned that the density of data for a mash-up should be very high to draw interesting inferences.
There are several ways to collect data:
In conclusion, I think if the data is less (< 20 points say) and precision is not required, then field paper method would be faster. This reduces the time wasted in converting formats. The data can then be replicated on the map using iD or Potlatch2(Flash alert!!). These editors are available online and many of my classmates with less number of points used them.
For a larger number of points we will proceed with JOSM method.
Preparing data
Once you have your data points in KML or CSV or geoJson. You can proceed with the following process. It is advisable to have a geoJson file. It helps in running vizualization when using Mapbox. Helpful tools are :
The process I followed was KML –> CSV –>geoJson
Icons and OSM features
Like Mapbox’s Maki icons, OSM also has its own set of icons. They can be rendered on the map when you choose specific tags. The list of tags are mentioned here. The icons column on the page shows the icons that will be shown on the map. For example : I chose to map sitting places in IIT Campus. The most semantically suitable choice was of a bench. I used the ‘field’ as ‘amenity’ and value as ‘bench’. You can choose appropriately. The features can be added to the points using the CSV file. Once you have the CSV file you can add a new ‘column’ as amenity (in my case) using your favorite spreadsheet software. Now, in every ‘row’ i.e. for each data point add the value. This would be ‘bench’ in my case. You can have additional fields as well. It is preffered not to have spaces in between the words of the field. Use an ‘_’ .
Once this is done, you should have a dataset in csv we can proceed to map them on OSM. As an additional step, I also generate a geoJSON file.
Rasagy suggested some pro-tips like :
Tagging for the renderer: The point is to collect the data and not have icons marked on the map. As many features might not have icons for them, it is suggested to mark real data.
One feature, one element : This point should be considered when adding details to already existing features. Instead of adding a new node/point for some area, it is better to include that detail in the existing polygon itself.
Operator- Key: Since, facilities in IIT will probably be run by IIT. It is worthwhile to include an operator key in the data. For example: The staff canteen could have an “operator: IIT Bombay” tag.
Some other tips i found here that deserve a mention are:
OSM Contributing
As a class, we tried several methods. The following method uses the JOSM IDE to import the data as a map layer and then contribute it to OSM database. Before proceeding, check multiple times that your data fields are correctly rendered. You can test this here. Once you update, it might be cubersome to update/edit them .
First, Download the IDE for the OS of your own choice.
I have documented it for windows that came bunduru-ed with my machine.
Once, the software is installed, we need to install a plugin called OpenData this enables JOSM to read csv files. Press F12 or Edit -> Pref and choose plugins and type opendata. You may want to do Download list before. Then check the box and click OK. This installs OpenData plugin.

Now we need a map layer to work on. The preffered way is to use ‘open location’ option from ‘File’ menu option. You are presented with the following dialog.

In this dialog, paste the url of the map you wish JOSM to pull. In my case, it was this http://www.openstreetmap.org/#map=15/19.1337/72.9126.
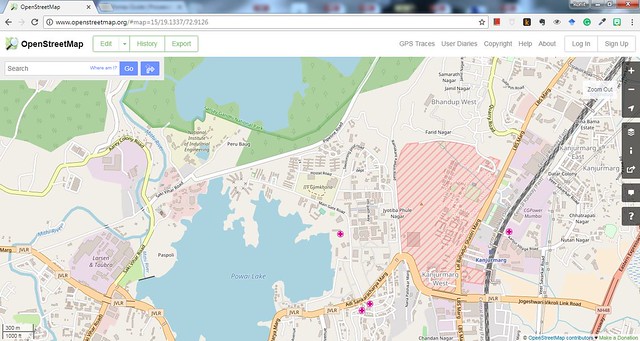
Once downloaded, I got this.

By the this point, we have a base layer ready. Now, I opened the csv file. The usual File –> Open way .

My file is ‘points.csv’.Click Open. In the popup while importing CSV. The default options worked. The file gets rendered correctly over the base layer as points. In my case the color of points was cyan.

Please check the points before proceeding.
Uploading to OSM
Once checked, you may proceed by clicking on the upload icon. I got this warning popup. I clicked continue as I had checked the data multiple times.

Next you get another warning. One of the fields had a space in between. I chose to ignore it as it was not a standard field anyway. But, I would strictly advice that you use only features mentioned in wiki. One should never mark outside the wiki, this would make your contributions virtually indiscoverable as the standard parsers/scrapers/crawlers would only use standard tags. If none of the tags fit the feature, you should request that particular tag to be added to the wiki.”This prevents everyone from tagging similar kind of features in their own way before a standard is set, and therefore OSM discourages using tags outside of what is currently listed on the wiki”, adds Rasagy.
You need an OSM account to upload. The API uses OAuth. The method that worked for me is ‘Automatic’. You are likely to get OAuth credentials. JOSM stores them for you. After the authorization part, you are required to commit the changes. You will be presented with the following dialog.

I chose the data source as ‘survey’. Now, press ‘Upload’!
Congratulations on contributing to OSM.
You can reopen the location to see your data. In my case, my benches are on the map.

You can pull the details by clicking on ‘History’ button.

I hope this guide will be helpful.
Following are the details of features marked by my classmates:
| Sno. | Feature Marked | Number | Contributor | tags |
|---|---|---|---|---|
| 1 | Police Posts | 56 | Udayan | amenity=police |
| 2 | Ladies Restroom | 205 | Shilpa | amenity=toilets;access=customers;female=yes;level=0; repeat_on=(floors) |
| 3 | Fire Hydrants | 95 | Amit | emergency: fire_hydrant |
| 4 | Dustbins | 115 | Manasi | amenity=waste_basket |
| 5 | Tea Shops | 20 | Pallavi | shop=tea |
| 6 | Auto Stops | 14 | Raagul | amenity=taxi |
| 7 | Print Shops | 16 | Vineet | shop=copyshop;service:copy=yes;service:print=yes;service:generalitems=yes;operator: name of the shop |
| 8 | Benches | 54 | Rohit | amenity=bench;covered=(state);seats=(number) |
| 9 | Drinking Water Spots | 56 | Manoj | amenity=drinking_water |
Links
Some useful links :
Acknowledgements
I acknowledge my classmates, Prof. Venkat and Rasagy for their contributions to this post.
Cheers,
Rohit