
Made with in India
Made with in India
This weekend, the new Star Wars movie got released. It might be ‘just’ another movie for the droids and gungans of the planet, but not for the Padawans like us.
Messa, Likes Star Wars! - Jar Jar Binks
Now, As we learn to master the force !
To make something that reminds us of the saga we need! Herh herh herh. -Yoda
What could be better than making a Doormat that senses a footstep (using capacitive methods) and plays a random star wars song like the opening theme or the imperial march or a famous phrase from the movie like “May the force be with you !” ?
Presenting the Star Wars Theme Interactive Doormat.
I kept it at the entrance of my room and every time there is someone to meet me, He is greeted with a Random Star Wars Jargon !
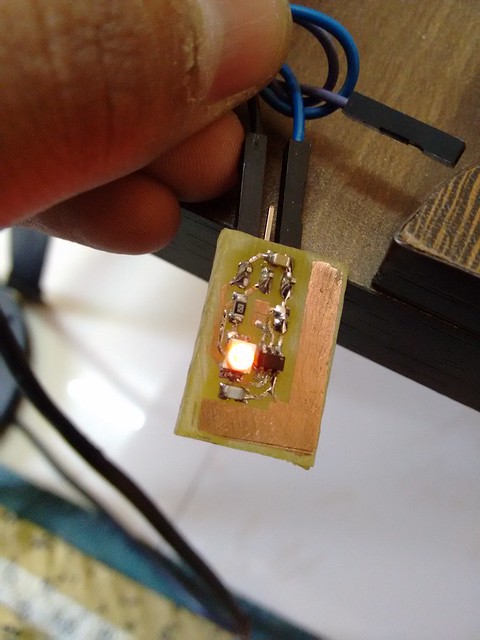
The setup is temporary and hence on the breadboard. For the brains i use the Arduino with a usual MP3 breakout that delivers the output to a pair of desktop USB Speakers. On the sensing front i have a capacitive wire loop under the mat and a tiny self-calibrating Capacitive sensor specially tuned to the mat size wire. The LED on the Arduino blinks to show that its ready to read the sensor. The sensor i am using is this one.I have used a big PLCC2 Pkg LED with a reference capacitance that matches the electrode length. I tried a few available caps. Then forgot the once i used. Argh!! SMD. The PCB is shown below. (Yeah! I know there is no bottom ground plane)
Now, when some-one (except Darth Vader/Droids) steps on the mat. The relative capacitance changes and the sensor grounds its output which is pulled up by default. This is detected by the Arduino which commands the MP3 player to play a random song/phrase from the assorted collection stored on the SD Card . And Yes! The whole setup is powered by a power bank (the black PVC Tube in the video above) that i made for my CX-10 pocket-Quad recharging, which powers the setup for about 6-7 hours easily. To split power between the USB Speakers and the Arduino, i use the USB Hub (in white with blue LED) .
Interested in the complete setup. Check out this video :D Sorry for the dull voice tone. I had the dark side messing up with me :P
Any questions or suggestion, have you, use the comment section below!
Seek Advice, You must!
May the force be with you ! :D
Rohit